A Retina workflow for Photoshop
Note: This article dates back from mid-2014. The advice is still sound, but do keep in mind that designing at 1x and producing your assets for several resolutions is a great method too. It's how I do it now :)
Published in May 2014Getting started with high-density (HiDPI) screens, like Apple’s Retina display?
Several design apps support half/dual resolution out of the box, but a lot of us still use Photoshop, either out of personal preference or to play well with other team members. One way or another, I assume you’re pretty damn efficient with Photoshop already. When I’m not using Sketch, here’s how I handle Retina mockups with grace.
Open your preferences!
- Cmd + K on OS X
- Ctrl + K on Windows
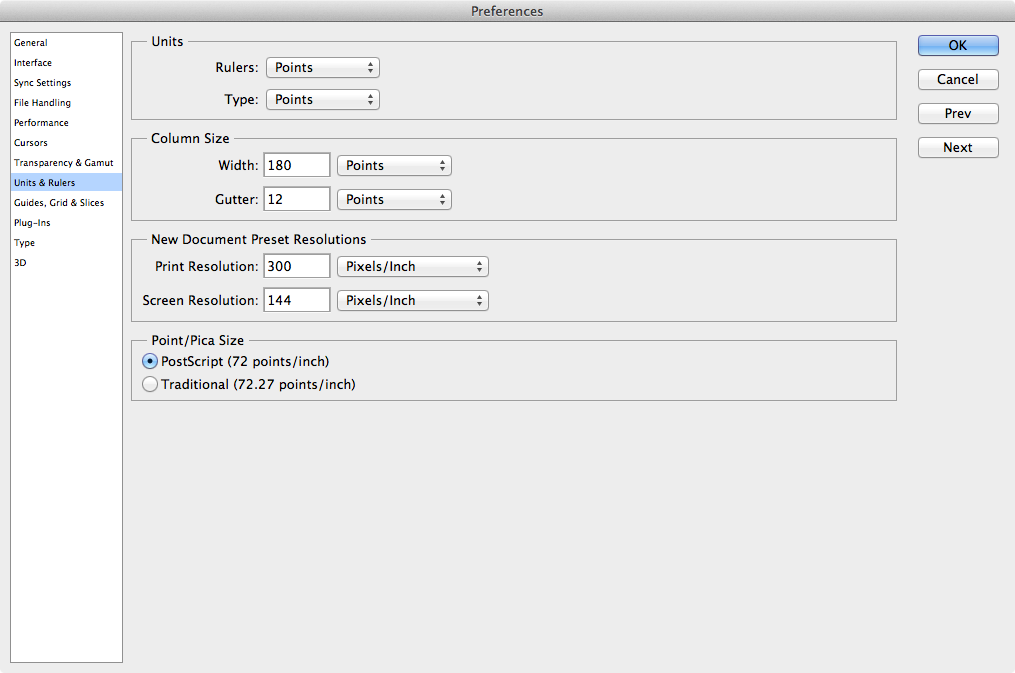
Go to Units & Rulers. This is where most of the magic happens.
1. Under Units :
Set both rulers and type to points.
2. Under New document Preset Resolutions :
A standard screen is considered to have 72 DPI. A Retina screen is at 144 (double). You can set the screen resolution to 144 as a default if you so desire (I prefer this).
Here’s how it looks. You can disregard columns, I personally have no use for global column settings:
New documents
Now we can start working with points as our coordinate system. That makes things pretty easy. Say you want to design for Android screens, from sizes medium and up in portrait mode. That means 320 x 470:
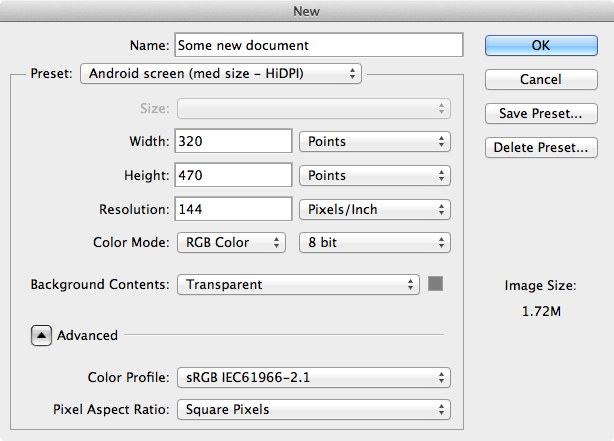
If you’re familiar with the developer side of these things, you’re probably aware that dimensions and positioning in these environments don’t work in pixels. They use points.
Here’s the basic difference: iPhone screens, whether they’re Retina or not, share the same coordinates system. They both “measure” 320 x 640 points, and that is how things are placed on screen. A full-screen image measures twice the amount in pixels, but remains 320 x 640 in points. These are the conditions we’re reproducing.
Changing your current PSD to Retina/HiDPI
This method shoud be a big help if you want to keep working in your existing PSDs, and simply bump their resolution 2x.
I’m assuming you’re designing mostly with text layers, smart objects and vectors. If you’re not, you’ll have a lot of extra work to restore everything that becomes blurry.
Open your document as usual. Once there, open Image → Image size… or hit the appropriate shortcut:
- Cmd + alt + i on OS X
- Ctrl + alt + i on Windows
Then, change your dimensions’ units (they’re probably on pixels) into points too. Make sure resampling is activated. Then (and only then!) bump the PSD’s resolution to 144 pixels/inch.
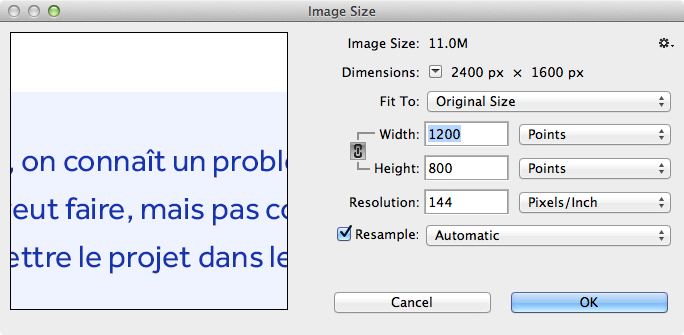
Once this is done, hit “OK”. Review your document. You should be all set!
:)
Note! While this setup means there is a pixel for every half-point, you’ll want to use whole numbers for position and dimension in your designs. This is because screens that do not have double resolution still use one pixel per point, so half-points will really land on half-pixels: this means blurry results.
Working with points
So what are the main differences?
Type is actually in points. If you’ve ever worked in print design, this change will make a lot of sense to you. For screen design, what it means is that you can use “real” sizes for your text, instead of Retina requiring double the actual size. 14pt text in your PSD will look like 14pt.
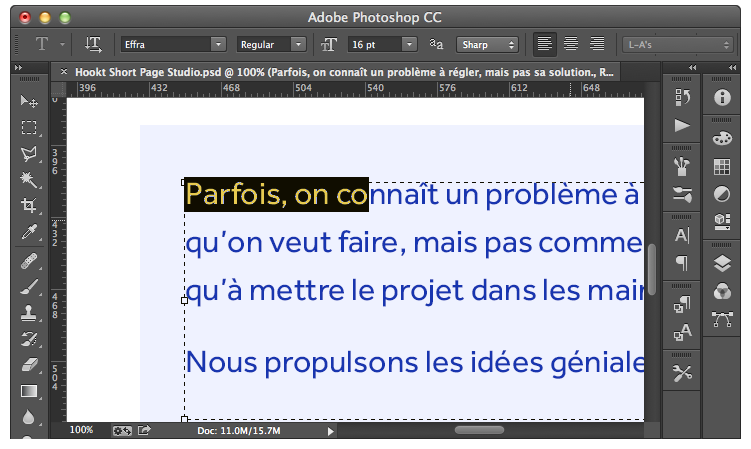
Rulers are in points. In the picture above, you can also see the rulers don’t match document pixels one to one. The ratio becomes 1:2, because this PSD has a 144 DPI resolution!
The coordinates on the rulers are what will be used in development, and they reflect their “real life” perception.
You can use points in your info palette, too! If you don’t use this palette, take this occasion to try it out. Set up your preferred units in the palette’s option dialog.
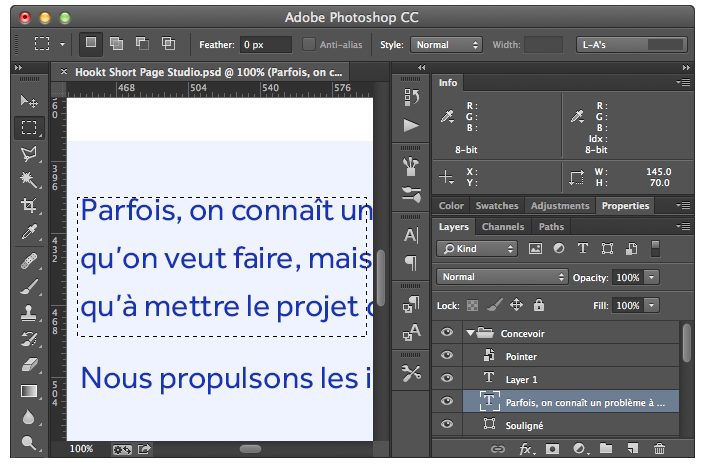
It’ll give you color readouts, the dimensions of what you have selected, and the coordinates (in points, if you want!) of your cursor.
That’s it!
It’s far from being the only (or the most complete) guide out there, but these are the basics that make it easy to uncouple pixels and actual dimensions in Photoshop.
From there, for example, you can easily create a 300DPI document for print, or a 18DPI document for this awesome pixel-art game you’re working on – all without losing your head around typography and unit conversion.