VESA mounting a 13 inch Cintiq
Here are the field notes from how my girlfriend and I modified her Cintiq 13HD to install it on an Ergotron’s VESA 100mm mount.
Our method leaves the tablet itself untouched, and the stand remains functional but only on its highest flap.
Summary:
- Procure M4 nuts
- Sacrifice the two lower flaps of the mount
- Mark your VESA holes from the inside
- Punch/drill while resting on a solid, flat surface
- Check for screw clearance and mount
1. Find or buy M4 nuts
M4 is metric, but it should be easy to find. You’ll probably need 8 (two per bolt). If you’re in North America, look in your hardware store’s hard to find section, or look for it in the fixtures/electrical department. Cabinet handles use metric, and you’ll often find cutaway screws for different door depths. Other options include asking a mechanic (metric cars & motorcycles). M4 bolts are relatively thin, which is what’s needed here.
2. Sacrifice the lower flaps of the mount
This is the only functional modification you’ll need to do. Consider if you want to keep them, there are options for just creating a complete holder from an easel, for example.
You’re fine with two less flaps? Good! After this, there are no dramatic removals.
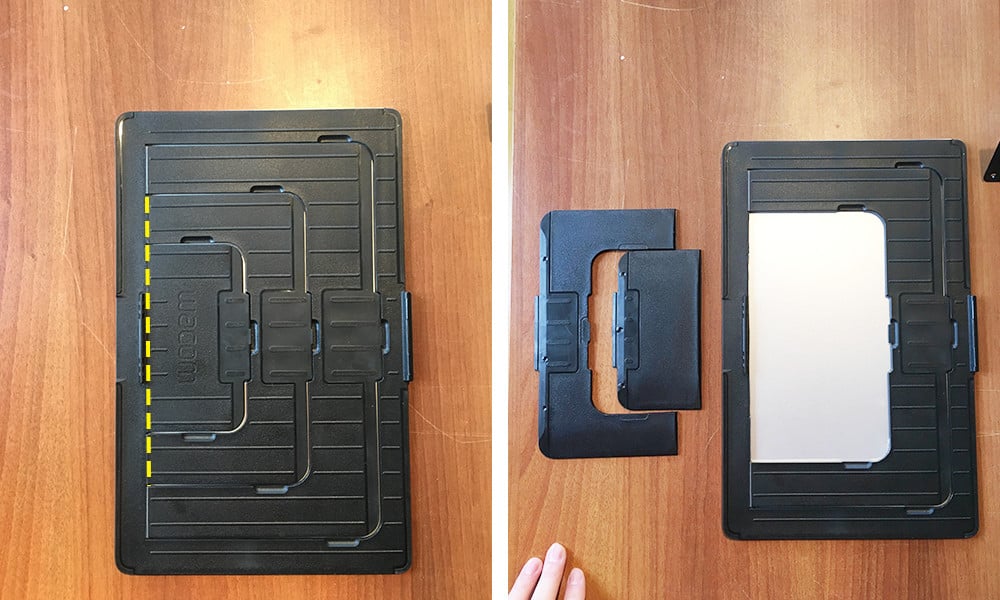
Fold each flap around 90°, and use a sharp blade to cut in the crease. The plastic is supple and will come off easily.
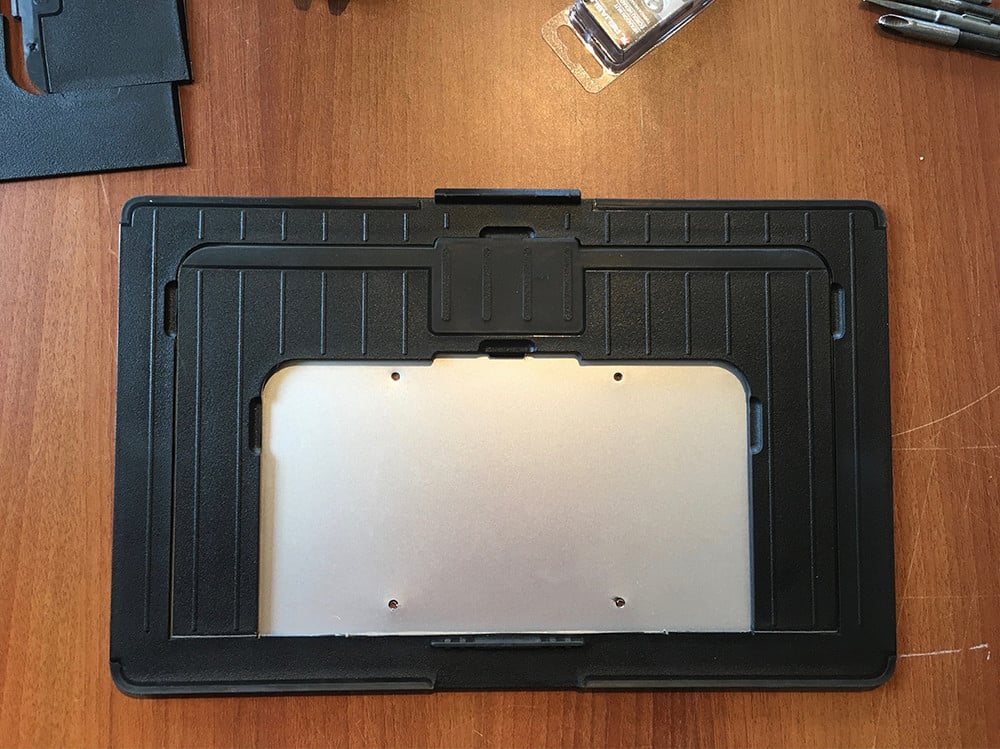
3. Mark your VESA holes’ positions
Lay the stand flat, and put the mounting bracket on it (doing it from the inside is fine). Make sure it’s well aligned and centered, then mark the center of each hole.
We kept the mounting bracket within reach, since it proved easier to mount the Cintiq’s stand on it this way.

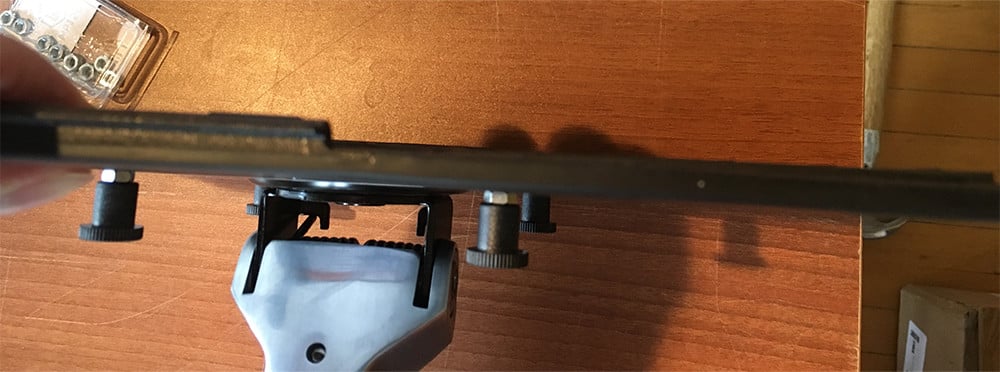
4. Mark/punch, then drill.
I recommend first punching your holes right in the center, which will allow a drill bit to stay centered. The stand’s backplate is metal and slippery.
Rest the stand on a flat, solid surface. A piece of wood is perfect. The metal will bend around your punch if it isn’t solidly backed (it did for me).
You can use a small Philips screwdriver, or a point tip if you have one. Center your punch as best as you can, then give it one sharp hit for each position.
Pick your drill bit. M4 screws need a 4mm (duh), or 3/16” hole. If you have it, 11/64” is closer. 5/32” is probably too tight. Hold the stand well in place. Use a bit that can handle metal, let it bite and turn slowly, the plate gives easily.
In a short time, you’ll have four clean, well-aligned holes!
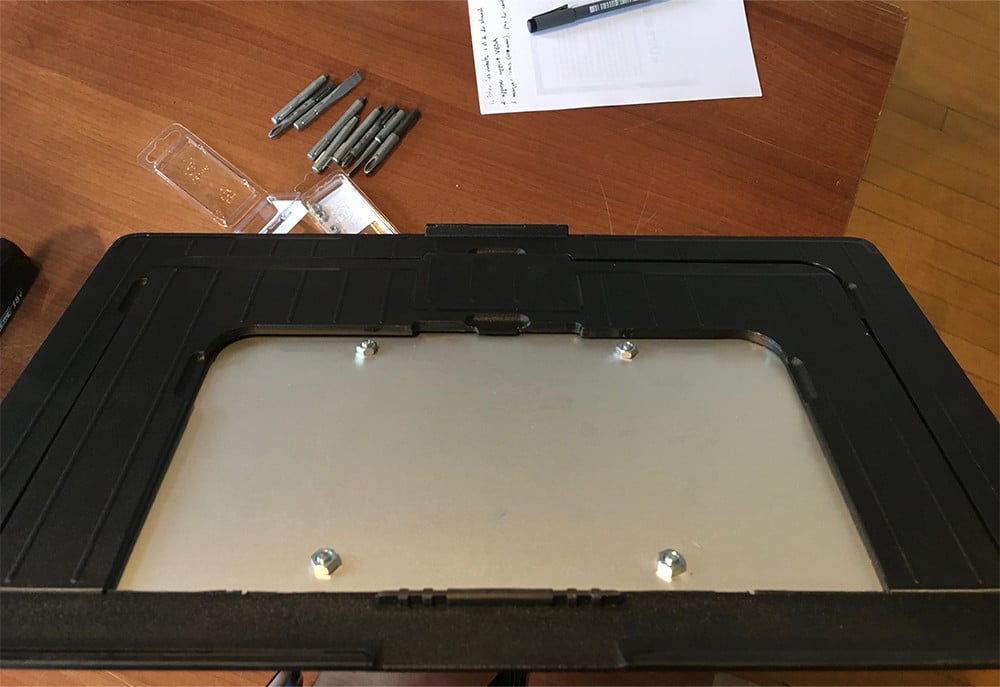
5. Check for clearance, then mount
Well, this is exciting! You can affix the plate to the VESA mount!
Check for your screws’ clearance past the stand. In our case, we added one nut to the head of each screw, to make sure it didn’t poke into the back of the Cintiq once everything is put together.

Put the stand on, so that its “hook” tab (the one around which the Cintiq rotates) faces up. The remaining flap will also point up.
In a diagonal pattern, mount the backplate to the VESA bracket. Make sure it’s tight!
Then add the tablet! Seat it on the stand’s hook, then be sure to “click” the bottom into place.
Boom!
Pros
- The stand remains usable.
- More sightly than the easel trick
- Your 13HD is on a legit VESA mount!
Cons
- The Cintiq 13HD is actually too light for many monitor arms (they’ll continuously push the tablet up instead of keeping it in place). Be careful when you pick your arm!
- The stand is metal, but certain arms will resist hard enough for it to flex if you try to tilt the tablet up and down. This is very noticeable on the Ergotron here, which is made to hold hard enough for a 20lbs monitor to stay in place. We tilt it by holding close to the VESA bracket.